


Cloud Storage makes media playback more convenient. Putting your favorite movies into one Cloud Storage and you can view them on your several multimedia players only if you can log into the cloud account. If you have a bookcase of Blu-ray disc collection, why don’t you rip these Blu-ray movies to Cloud Storage? You can keep your Blu-ray disc from destroy for too much insert-to-object and stream Blu-ray more conveniently.

Hot search: Blu-ray to WD My Cloud | Movies to Seagate Wireless Plus | Blu-ray to Personal Cloud
Before transferring Blu-ray movies to Cloud Storage, you need to rip the Blu-ray to a more compatible format like MP4. After all, common media players and portable devices can’t play Blu-ray movies for the encryption. You can use Pavtube BDMagic (Review) to get the work done.
It can extract MP4/MKV/AVI, etc video from any commercial and region-locked Blu-ray, Video_TS folders or IFO and ISO image files. Considering the limited space of normal Cloud Storage like DropBox, Amazon Cloud Drive,Dropbox, Google Drive, Box, the app enables you to compress Blu-ray movies to Cloud Storage with a smaller video size by adjusting video size, codec.
For Mac users, the equivalent Mac version is Pavtube BDMgic for Mac which has updated to support Mac OS X El Capian system.
Free download and install:


Other Download:
– Pavtube old official address: http://www.pavtube.cn/blu-ray-ripper/
– Cnet Download: http://download.cnet.com/Pavtube-BDMagic/3000-7970_4-75922877.html
How to put your Blu-ray collection to Cloud Storage?
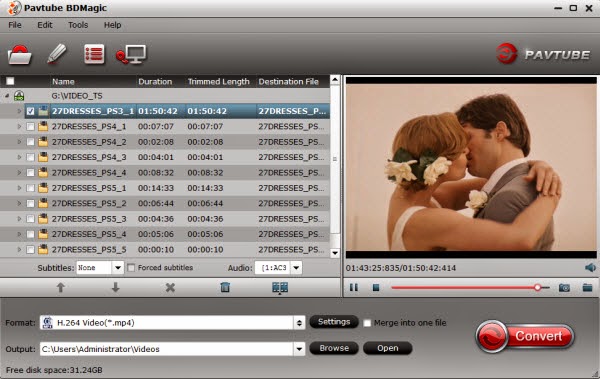
Step 1. Import Blu-ray source video
Click the “File” button to import Blu-ray videos into the application. It supports batch importing so that you can add as many video files as you wish.
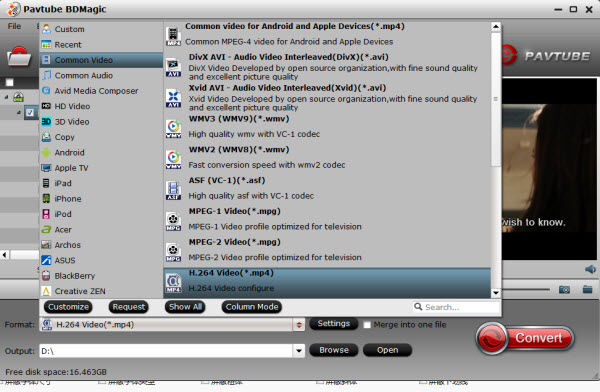
Step 2. Choose suitable format
Click on “Format” bar to select output format. You can choose H.264 MP4, MPEG-4 MP4, MPEG-2, FLV, MKV, WMV, etc as target format on Window. Here, we choose H.264 mp4 as the target format for its wide compatibility with all kinds of devices.
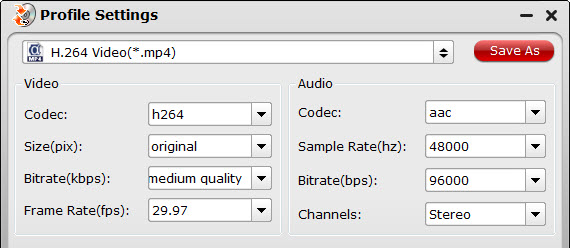
Tip: If you want to store more Blu-ray movies on Cloud Storage, I suggest you to compress the video size. Click “settings” next to format bar, you can change video bitrate and size to affect the video size.. Remember, lower bitrate results in smaller size but higher quality loss.
Step 3. Start ripping Blu-ray to Cloud Storage
Click the “Convert” button at the bottom right corner to start backing up Blu-ray for Cloud Storage. After conversion click “Open” to find the generated videos.
Generally, uploading local media to Cloud Storage is easy. You log into your cloud storage provider account then attach the media on your computer to cloud storage. Then you can watch Blu-ray movies via Cloud Storage on your different computers, mobile phones, iPad.
Related Articles
Hot Articles & Reviews
- Best Free Blu-ray Ripper Review
- Best 4K Blu-ray Ripper
- Best 5 Blu-ray Ripper for 2017
- Which Blu-ray Ripper You Should Get?
- Best 4K Blu-ray Ripper Review
Any Product-related questions?


Leave a reply